Thursday, April 23, 2020

Easy Chocolate Covered Pretzels

Who doesn't like chocolate covered pretzels? Monsters, that's who. Salty, sweet, crunchy, and delicious. Today I'm going to show you an easy way to make them at home with ingredients I'm sure you have sitting around your kitchen today. I made mine with dark chocolate, but you can easily adapt for milk if that's your preference.

Start off with pretzels of your choice. I prefer mini twists because they're easier to eat by the handful. You can use large twists or rods. I'd stay away from the honey mustard and onion bites.

Next, run them through your enrober filled with tempered dark chocolate. As I said above, if you'd prefer milk chocolate, just drain the enrober and fill with tempered milk chocolate. Simple!

Let them ride through the cooling tunnel, making sure to keep the temperature between 62 and 67 degrees Fahrenheit. This will make sure the chocolate sets beautifully and gives you a nice snap and a shiny surface.

Done! I told you it was easy! There's no reason you can't be eating chocolate covered pretzels right now if you're so inclined. 

Notes: 
  • Make sure your chocolate is tempered, otherwise you won't get that good shiny surface and snap. I recommend running a test pretzel before committing to a whole batch.
  • As you're putting pretzels on, make sure there are no gaps in that curtain of chocolate, otherwise you'll end up with half covered pretzels and nobody likes that.
  • Temperature control is key! Too hot or too cold and you'll throw the chocolate out of temper. Make sure you have two good thermometers, one for the enrober and one for the cooling tunnel.
  • The enrober I have takes 15 minutes from the moment something enters until it comes out the cooling tunnel. Yours may differ, so do some tests and set a timer so your pretzels don't end up on the floor while you're still putting them on, completely unaware.

If all this is still too much work for you (lazy!) I won't judge if you just buy some from your favorite local candy store.

Monday, April 20, 2020

The Fish Taco Experiment

What inspired me to start this blog was making up a bunch of wacky dishes because I'm stuck at home with limited supplies, bored, and hungry. I will eat just about anything, so smashing things together in the kitchen is like second nature to me. Somewhere along the line I started posting real recipes. Nobody wants that. Let's get back to the roots and get real weird with it.

I used to work for a place that made great fish tacos. We had a nice big piece of high-quality fried fish cut into strips, a tangy coleslaw made with fresh shredded cabbage, red onion, red wine vinegar, and hand-juiced limes, topped with a spicy chipotle mayo. I wanted to recreate that at home, but the problem is the only ingredient I have that's the same as the restaurant is flour tortillas. What I do have is this:

What you see here is mayo and chipotle Tabasco for the sauce, instead of the whole chipotle chiles with adobo. Lettuce and cabbage are basically the same, right? I hope so. I've got some leftover shredded lettuce that's seen better days, a white onion, white wine vinegar, and "real" lime juice. And of course, the finest fish sticks money can buy. 

I threw the fish sticks in the air fryer (not pictured) and got to work on the rest of the toppings. A handful of lettuce, a minced slice of onion, vinegar, lime juice, salt and pepper make up the slaw. Judging by how this looks and feels, I'm not holding out a ton of hope. This is like when the lettuce at the bottom of the bag is all wet and gross.

Instead of blending whole peppers and adobo into the mayo, I'm just gonna hit a scoop of mayo with a few dashes of the chipotle Tabasco. I really like the Tabasco on its own. It has a nice smoky taste with a not overwhelming level of spice. I'm hoping this will mimic the flavor of the sauce nicely.

Stir to combine. Ended up tasting and adding a couple more shakes of Tabasco. This really isn't bad at all. It's definitely not as good as the real version, which has more depth to the flavor. This is more like a fast-food version: okay but not great. It scratches the itch and I'll keep it in mind for when I want a single serving of the sauce instead of having to make up a big batch with the peppers.

Fish sticks are done and very crunchy! I love the air fryer. I got my son to try a bite of an extra one to see if he would like fish sticks. He did not.

My favorite way to heat tortillas when I'm just doing a couple for myself is directly on the flame. It's gets nice crispy charred spots and heats very quickly. Just keep it  moving and use tongs so you don't burn yourself. The tortillas will catch on fire, as pictured at about 9 o'clock there, so watch out. If you don't have a gas stove, you're out of luck. Throw away the food you've made already and wait until a gas stove can be delivered. Don't have gas in your house? I dunno, man. Move. 

Let's build! Put some lettuce slaw down on the warmed tortillas. I squeezed out a lot of juice from this because it was very wet and soggy.

Crispy fish sticks hopefully will counter the soggy slaw.

Top with a drizzle of that mayo that I discovered is thicker than the regular version (I assume because it's lacking adobo sauce which is thinner than the mayo and would make it a bit runnier) and hard to drizzle. So top with a glob of chipotle mayo. Yum.

Take it outside for a picture in the natural light, take a deep breath, and taste. Honestly...this was really good! I fully expected this to not work but I enjoyed it a lot and scarfed these down pretty quickly. The one thing I didn't like was the texture of the slaw. The flavor was on point, nicely acidic and tangy, but texturally it was soggy and gross. I have thoughts on the slaw problem that I'll share in the notes. I call this experiment 100% successful as I'll definitely be making these again!

Notes:
  • If you're going to plan to make these, I would recommend using cabbage and red onion in the slaw for sure.
  • If you have to use lettuce in a pinch like I did, I would try mixing up the dressing separately and tossing the lettuce in it right before you serve. I'd probably also either use towels or a salad spinner to make sure it's dry as possible first.
  • The fish sticks worked fine, but I imagine those little beer-battered fillets would be even better.
  • If I had the stuff on hand, I'd make a batch of the real chipotle mayo and keep the rest in the fridge. That stuff is good on anything. The Tabasco workaround is good in a pinch.

The success of this experiment makes me inclined to try others. Stay tuned!

Friday, April 10, 2020

Clear-the-fridge Fried Rice

This is another one that's more of a technique than a recipe. You can add or subtract anything you want or have in the fridge, which is why I call it clear-the-fridge fried rice. My main goal here was to use up a container of chicken stock I made over the weekend that was probably reaching its last days. 

As I said above, I've got chicken stock and rice. I grabbed some pepper and onion blend and peas out of the freezer. Decided to add a can of Spam for some meat.

Step one is to get the rice cooking, following the method that I outlined previously. Since my goal was to use the stock, I poured that out first to determine how much rice I was making. Ended up just under two cups, so I rounded up with some water and added a cup of rice.

While the rice was cooking, I cubed up about half the tin of Spam and grabbed a handful of each of the frozen vegetables into a dish to wait. I'm going to take a second to get on my Spam soapbox: I think it has a bad rap and people knee-jerk to "Ugh, Spam, gross!" Yeah it looks weird coming out of the can but if you eat bologna or hot dogs and still won't even try Spam, you're missing out. There's a lot than can be done with it and while it's probably not the best thing to eat every day, it's handy to have a shelf-stable meat that's rather versatile. Back to your regularly schedule food post.

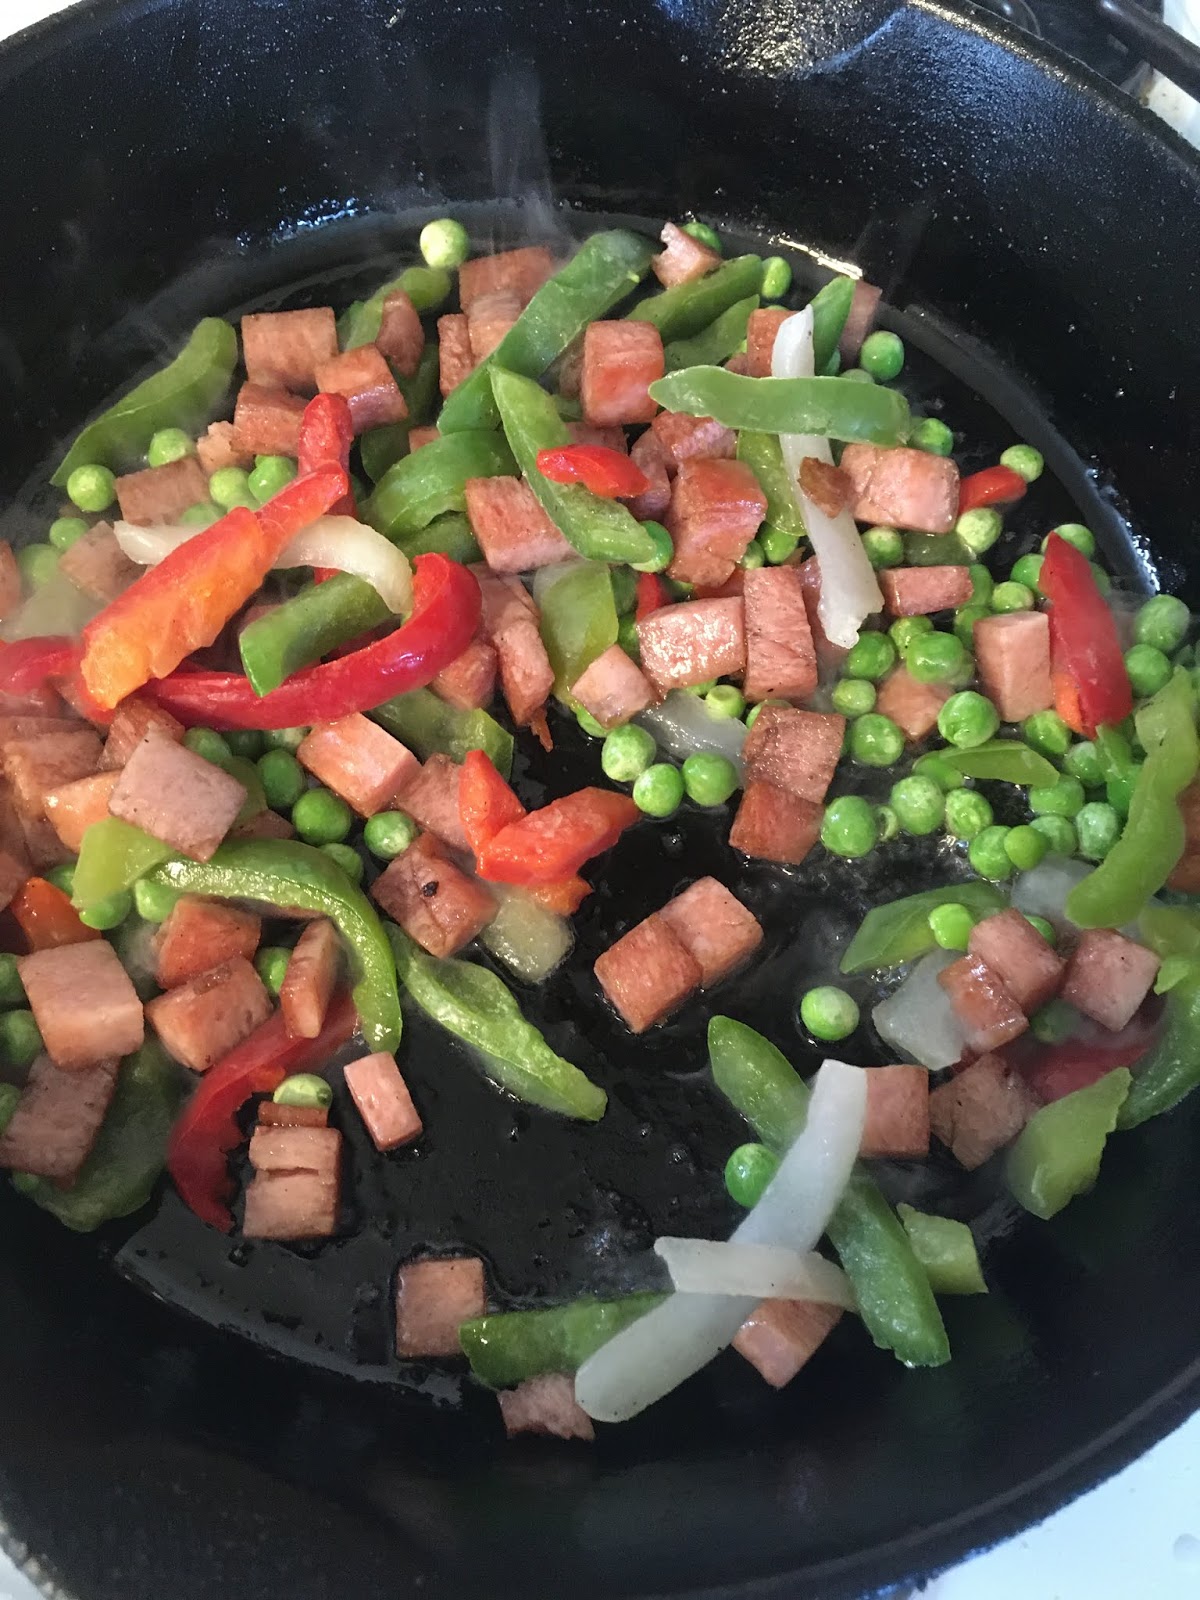
While the rice is cooking, throw your cubed Spam into a medium-hot cast iron and get some color on it. Keep it moving, we want it golden and not burned.

When you're satisfied with the color, throw the veggies in and get color on them as well.

Rice is done! Fluff it around and remove to a big plate to release the steam and dry up a bit. You want it as dry as possible before you fry. I didn't get mine as dry as I would have liked but it still works. 

Remove the veggies and Spam back into a bowl while you get your cast iron going over high heat and add some oil.

When the pan is hot and the rice is dry, add rice to the pan and press it down in. I probably could have done this in two batches for better results. This is sort of like making hash browns. You want a hot pan, press it in, then leave it alone for several minutes to develop a crust.

Nice golden brown bits! Flip it over in sections, press down, and wait. Repeat until you have enough crust or your hunger wins out.

Chop the rice up and stir in the bowl of Spam and veggies. Now is also a good time to season. I added some soy sauce packets, garlic powder, and a little dribble of sesame oil. You can really spice it however you'd like, but keep in mind Spam and soy sauce is salty so go easy on added salt. Or not, it's your blood pressure. 

I decided to add some eggs, so I scrambled two in the same bowl I've been using for everything. Extra flavor and fewer dishes to wash.

Make a well in the middle of the pan, and pour the egg in. Stir it up, slowly bringing in the rice from the edges. This is similar to making pasta, but the flour is rice and the egg is still egg. This is going to happen quickly because the pan is hot. In fact, you can kill the stove and let residual heat take it through the finish.

All finished! Give it one final taste for seasoning and move to a plate.

Serve topped with a drizzle of Sriracha. Putting sesame seeds or green onions on top would be good as well, but it's clear the fridge, not fancy fried rice.

Notes:
  • This really goes well with anything you have in the fridge. Use fresh onions, carrots, leftover pork chops, hot dogs, whatever you can find. 
  • For best results, make your rice the day before and let it dry out in the fridge. The longer the time between when the rice is done and when you fry it, the better the finished product is. 
  • The problem is, I never decide I want fried rice a day in advance. You can cheat your way along by spreading it out uncovered on a baking sheet and refrigerating for a couple hours, or microwaving for a few minutes to get rid of some of the water. 
  • Fresh garlic makes this really good, but I was out. Garlic powder makes it pretty good.
  • Seriously, try Spam.
Enjoy!


Monday, April 6, 2020

Grilled Chicken Salad Sandwich

The chicken salad isn't anything special but grilling it takes it to the next level. There's something here that makes any grilled sandwich 1,000% better. I've got another tip for grilled sandwiches that I don't think you're ready for yet, so we're gonna start with this and bring out the pro tip next time.

To make one sandwich, you'll need bread, carrot, onion, chicken, mayo, salt, pepper, and garlic pepper. I prefer sourdough bread if at all possible. The chicken salad can be made with whatever you've got laying around, which is why I used carrot and onion. If you have a recipe you like, by all means use that. Sometimes I like to get crazy with some grapes and walnuts. I'm using leftover rotisserie chicken here, you could use canned in a pinch. Whatever spices you find are good too. I found a jar of celery salt after I took this pic, and it worked really well in there.

Here's the sandwich tip: Grill the inside of your bread as well as the outside. You get crisp on the outside, crisp in the middle. You get better structural integrity for your sandwich, which means less chance of it all falling into your lap. So to start off, pick whatever side is going to be the inside (and there is a correct answer, but that's for another day) and grill over medium heat until toasty. 

Look at how delicious the inside of that sandwich is! Once you have it crisped to your liking, remove from the heat and prepare your filling.

This is just diced carrot, onion, and chicken with mayo, celery salt, pepper, and garlic powder. Mix to your desired consistency. 

Get the bottom slice in the pan, crisped side up. Load on your chicken salad, then top with the other slice, crisped side down.

Cook until crispy again, then flip and crisp the other side. This is right after the flip. A little darker than is ideal, but still really good.

When done, cut in half on the bias and take it out onto the back porch to take a picture. Be careful not to drop it on the dog begging at your feet.

Notes:
  • The basic thing I want to get across with this post is to grill both sides of your bread when making a sandwich. This may be common sense to some people and earth shattering to others. Before I heard about this, I was an outside-only guy. They were okay. Doing both sides makes it way better. Try it with a plain grilled cheese to see for yourself. Extra credit if you do one on both sides and one outside only and have a taste test.
  • This works great with tuna salad and cheese for a fantastic tuna melt.
  • As I said above, I have another Super Sandwich Secret that I plan to tip in the future. I actually have a sandwich series planned for a couple months from now. Stay tuned and hope I don't get bored and stop doing this.
  • Sourdough bread is the superior sandwich bread. Fight me.


Sunday, April 5, 2020

Easy Instant Pot Chicken Stock

I was never one for homemade stock until I got an Instant Pot. Now, it's one of my favorite things to make. Very easy, mostly hands off, and you end up with a very tasty finished product. 

All you need are things you likely have laying around already: chicken bones and vegetable scraps. You can use bones from a $5 rotisserie chicken like I have here, or leftover from your voodoo rituals. For the vegetables, I like to keep a gallon freezer bag to put trimmings from garlic, onion, and celery in and just stash in the freezer until it's full. You'll get plenty of flavor from the peels and ends you were going to throw away anyway. One full bag gets about two batches of stock.

Additional seasonings that don't fit in the first picture: kosher salt, black peppercorns, bay leaf, and apple cider vinegar. They say the vinegar does something with the bones and extracts more flavor or something. I dunno. It's a splash, if you got it put it in, if not don't worry.

Put your bones, veggie scraps, seasonings, and about 12 cups of water into the Instant Pot. I think I put in too much pepper because this broth is a little spicier than usual. Live and learn. I literally don't measure this at all, just do what feels right in your soul. The only reason I know I used 12 cups is because I used a measuring cup to transfer from the sink to the pot. I usually use the Brita from the fridge, but it was low. As you can see, I also added some baby carrots that were sitting in the fridge for some extra flavor. Seal the pot and cook on high pressure for 2 hours.

When it's done, I like to let it natural release for at least a half hour. This ended up going for just under an hour because I was watching Wrestlemania. Marked difference from how it all looked before pressure cooking. Everything has given up its flavors.

Set up a draining rig in your sink, just in case of some splashing. MAKE SURE YOU HAVE A BOWL UNDER THE COLANDER TO CATCH THE STOCK! I've read too many horror stories about people spending all day on a beautiful stock and then pouring it down the drain. Don't be that guy!

Carefully pour out the contents of the pot into the colander. As you can see, the bones are clean and everything is gross and flavorless. Except for the pot of stock, which is now awesome and flavorful.

An optional but highly recommended step is a second filtering to remove small bits of sediment. I use peels and roots and end up with bits of dirt in there, I'm sure. I'm not worried about the germs because it boils for 2 hours, but it just doesn't look nice. This is a double layer of cheesecloth in a metal strainer held in place by two binder clips. More clips would be nice, but I have two so that's what I used. Definitely better than trying to hold it and pour hot stock at the same time though.

If it wasn't for this second filtering, all that junk would be in your pot and nobody wants that. Cheesecloth can theoretically be washed, dried, and reused but it's cheap and you get a bunch from Amazon so I just toss this. As I'm fond of saying, you do you boo.

It's hard to photograph this in the pot because it's very dark, but the spoon gives you a bit of an idea. Nice golden color, very flavorful, smells amazing. Definitely worth the small investment of time to get this out of what would have been trash. 

Notes:
  • You can make this on the stove if you don't have an Instant Pot. I've never done it, but I'd say put everything in a big pot, cover with water, and simmer for a couple hours.
  • I like to use the stock instead of water when making rice or instant mashed potatoes for extra flavor. 
  • I also like to just drink the stock by itself. I'll usually have a couple cups to sip on while I'm waiting for it to cool down enough to package and store in the fridge.
  • You can freeze this for long term storage, but mine's never lasted that long. If you want to be fancy, pour it into ice cube trays, freeze, then put the stock cubes into a freezer bag.
  • In addition to a bag of vegetable scraps, you can also have one for chicken bones (or just animal bones in general) and save those as you cook. Then you can get stock without having a rotisserie chicken, but in my mind those $5 chickens are one of the best investments you can make.
Enjoy drinking your garbage!


Friday, April 3, 2020

The Laziest Tuna Casserole Ever

When I was growing up, one of my favorite meals my mom made was tuna noodle casserole. She used a recipe from a big Betty Crocker cookbook and you had to boil egg noodles, mix two or three soups, shred cheese, and bake it all. It was a big to-do but it was delicious. I don't have time for all that, but I do have time for the laziest tuna casserole ever. A friend of mine told me about this a few years ago and I've been making it since. I usually have this stuff in the cupboard so it makes a good go-to quick dinner.

You'll need a box of mac and cheese, a can of cream of mushroom soup, and a can of tuna. I had an onion and some frozen peas so I decided to fancy it up. I don't usually do this and it's just as good without. I think some bell pepper or celery would go well in this, if you have it on hand. You'll also need the butter and milk to make the mac and cheese, but if you have the one with the bag of cheese sauce already made, omit this.

Time for a crash course in the quickest way to make pasta: Forget about gallons of salty as seawater at a rolling boil. Put your pasta in a pot and add just enough cold water to cover. Dash of salt, and put it over high heat. The pasta will absorb the water and cook up very quickly. Keep an eye on it, because there is definitely a fine line between cooked and burned and the closer it gets to done the faster things move.

If you're adding onion, now would be a good time to do it to get rid of the raw onion flavor. Instead, you get a nice boiled onion flavor. I don't know if that's a selling point or not, but there it is. 

Might be hard to tell from this picture, but when the pasta is done most of the water will have absorbed and you'll be left with a little starchy, filmy residue. No draining necessary!

If you're using frozen peas, now's a good time for those. Mix them around and let the residual heat thaw them for you. 

Add the butter, milk, and cheese packet and get things mixed around until the sauce is smooth.

Add a can of mushroom soup, and mix well.

Add a canned of drained tuna, and mix well. Give it a taste to check for temperature. Adding frozen peas and room temperature soup will cause things to cool off quite a bit. This was the perfect temperature for my son, so I scooped out his serving right away. I wanted mine a little warmer, so I put it over medium heat and stirred until it was warm.

Finish with your favorite crunchy topping. I prefer kettle cooked salt and vinegar chips. The crunch is a nice contrast, and the tang of the vinegar compliments the fish well. I should have taken a picture before covering the top in chips, but live and learn. Imagine the previous picture, but with the tuna stirred in.

Notes:
  • This recipe is extremely customizable. Add or subtract anything you like. 
  • If you want to feed more people, this is easy to double. 
  • To make this more like a traditional casserole, you could put this in a dish, top with breadcrumbs or cornflakes, and bake until the top is browned. 
  • I do have a recipe for a more traditional tuna casserole that's still pretty easy that I'll share at some point. 
  • You wanna really get crazy? Throw some of this in a tortilla, wrap like a burrito, and grill until crisp and brown. I don't know why, but it works really well. Then you end up with portable tuna noodle casserole.
Enjoy!